
Customize Your Dashboard
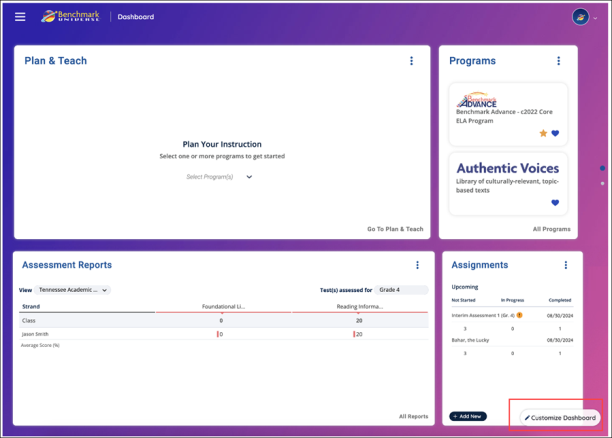
Teachers and administrators can customize their Dashboard. They can add or remove widgets, as well as change their profile and background pictures.
How to Customize Your Dashboard
Teachers and administrators can customize their dashboard by following these steps:
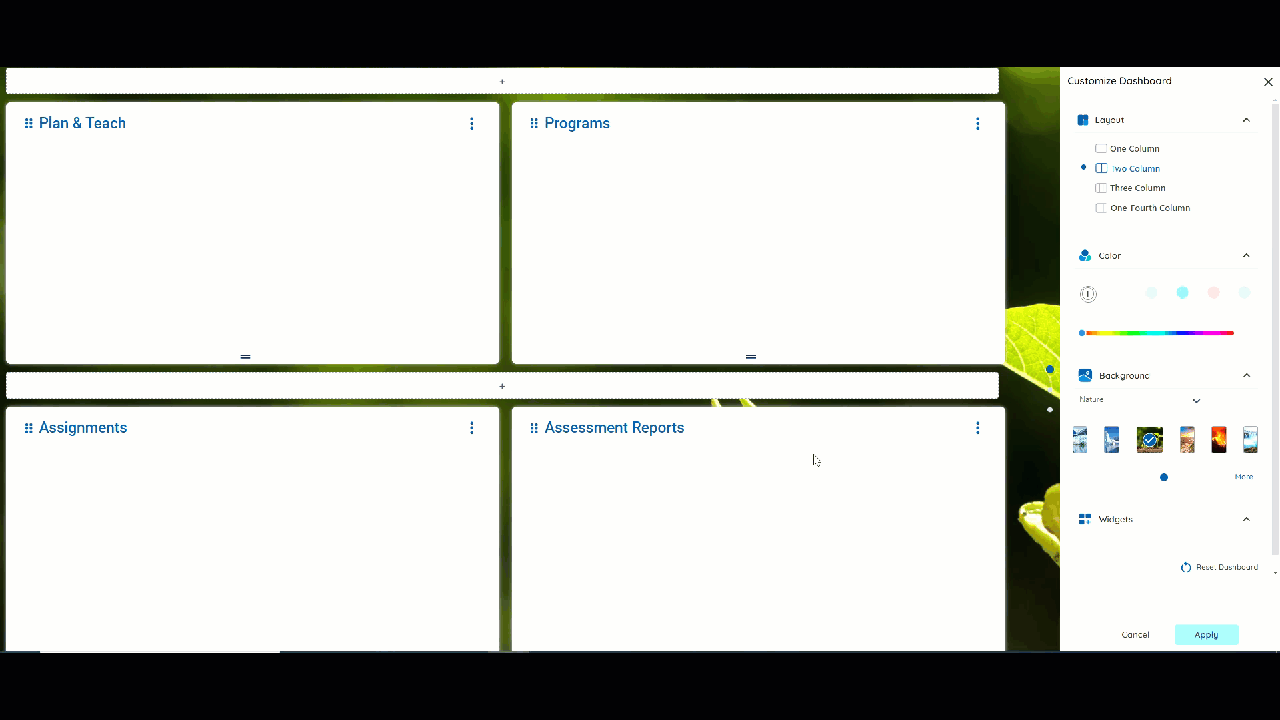
- Access the menu by selecting the Customize Dashboard button. This button is also available from the Widget Settings menu accessible on a widget through the More Options button.

-
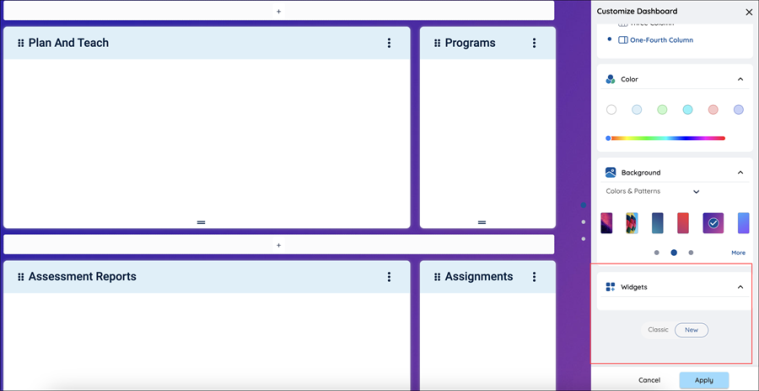
Select a layout from the menu. This determines the number of columns displayed on your dashboard, allowing you to adjust the size and arrangement of widgets to better suit your teaching and administrative needs.
-
Drag and drop widgets to reorganize your dashboard and prioritize the placement of specific widgets.
-
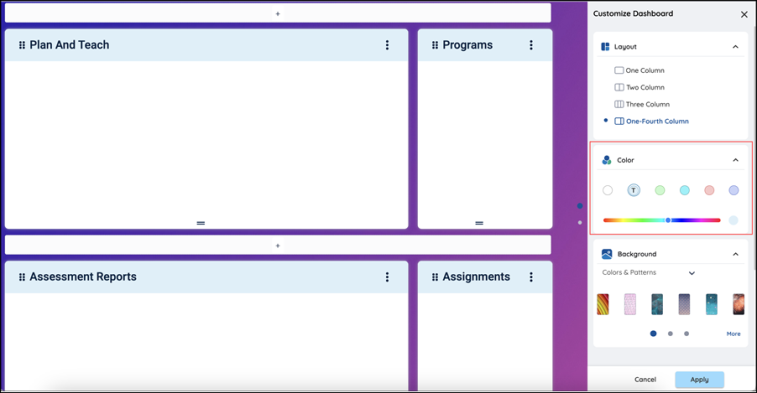
Select a color for your widgets. You can select from a menu of color options or create your own using the slider inside the color spectrum.
-
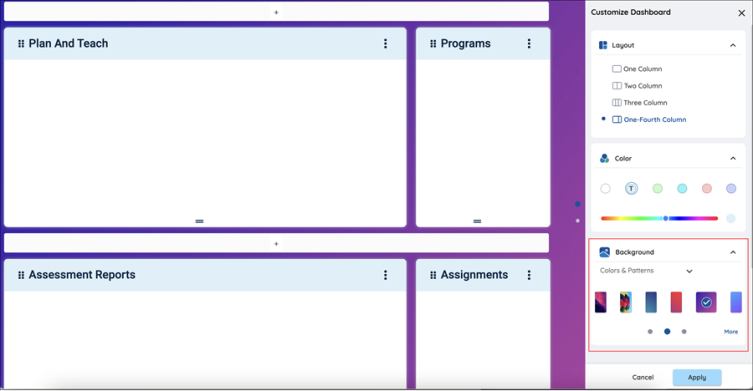
Choose a background for your Dashboard. Use the dropdown menu to change the category of available background, which include animals, colors, and other options. Use the More button to access the Profile Picture and Background Selection menu.
-
Add Widgets. Add a widget you may have removed by selecting a widget from the dropdown menu.

The ability to toggle between the New and Classic Dashboard is available here.

-
Press the Apply button.
Adjust Widget Settings
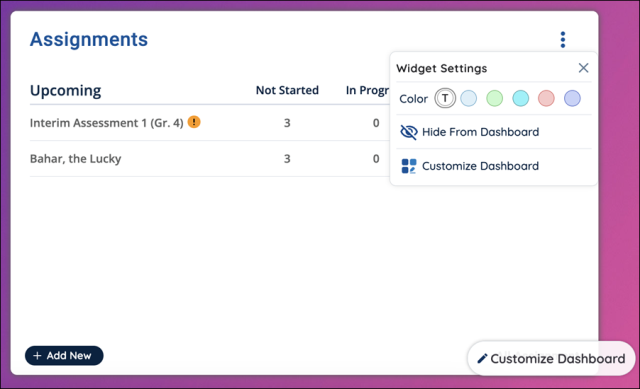
Use the More Options button on a widget to access the Widget Settings menu. Here you can change a widget’s color by selecting a new color from the row of available options. Hide it from view by using the Hide From Dashboard icon. You can also access the Customize Dashboard menu by selecting the Customize Dashboard button.
Last Updated: February 10, 2025